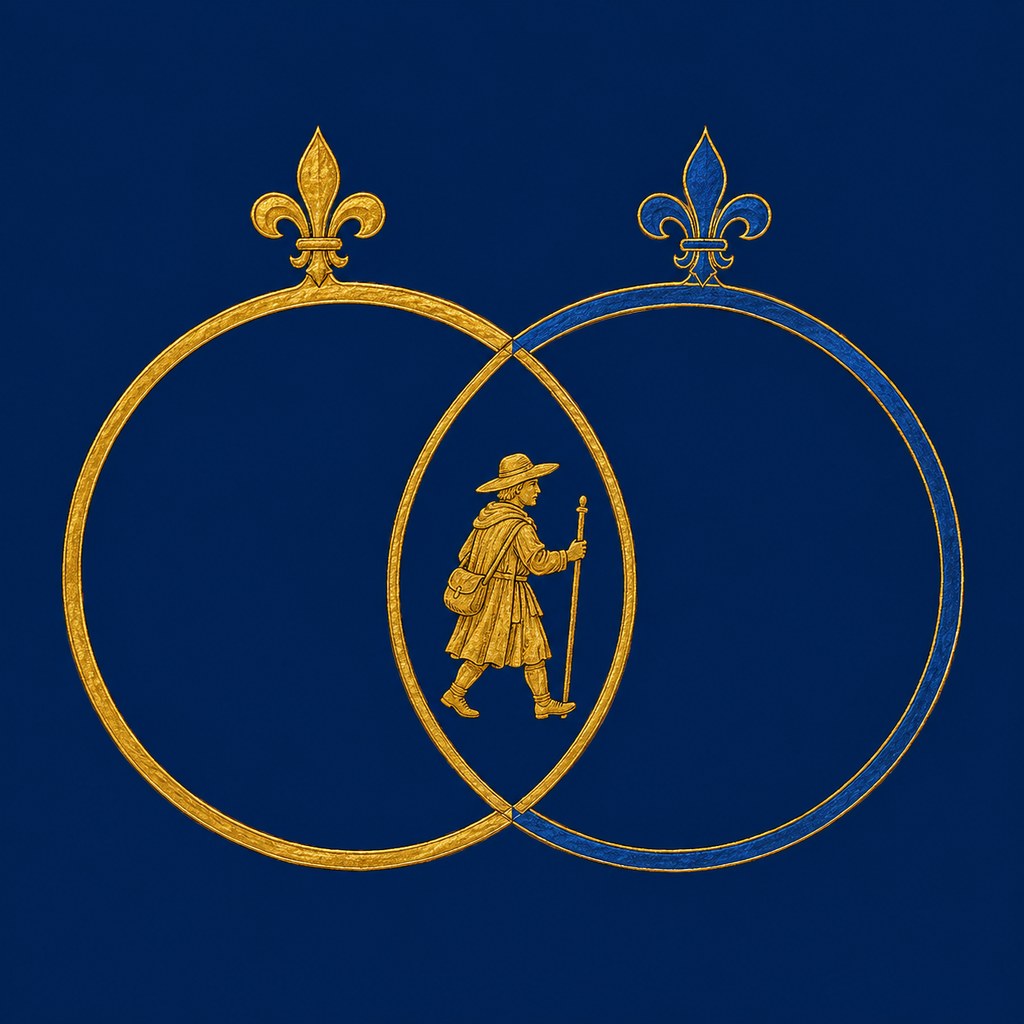
The pilgrim emblem
In use: the home hero and the navigation mark. The seed of the identity, first made for the Two-Age Sojourner site and reassigned here.
Full size (opens in a new tab)The artwork, marks and film that carry the Between Two Realms brand, gathered for reference and reuse. Each plate links to the full-size file.
In use: the home hero and the navigation mark. The seed of the identity, first made for the Two-Age Sojourner site and reassigned here.
Full size (opens in a new tab)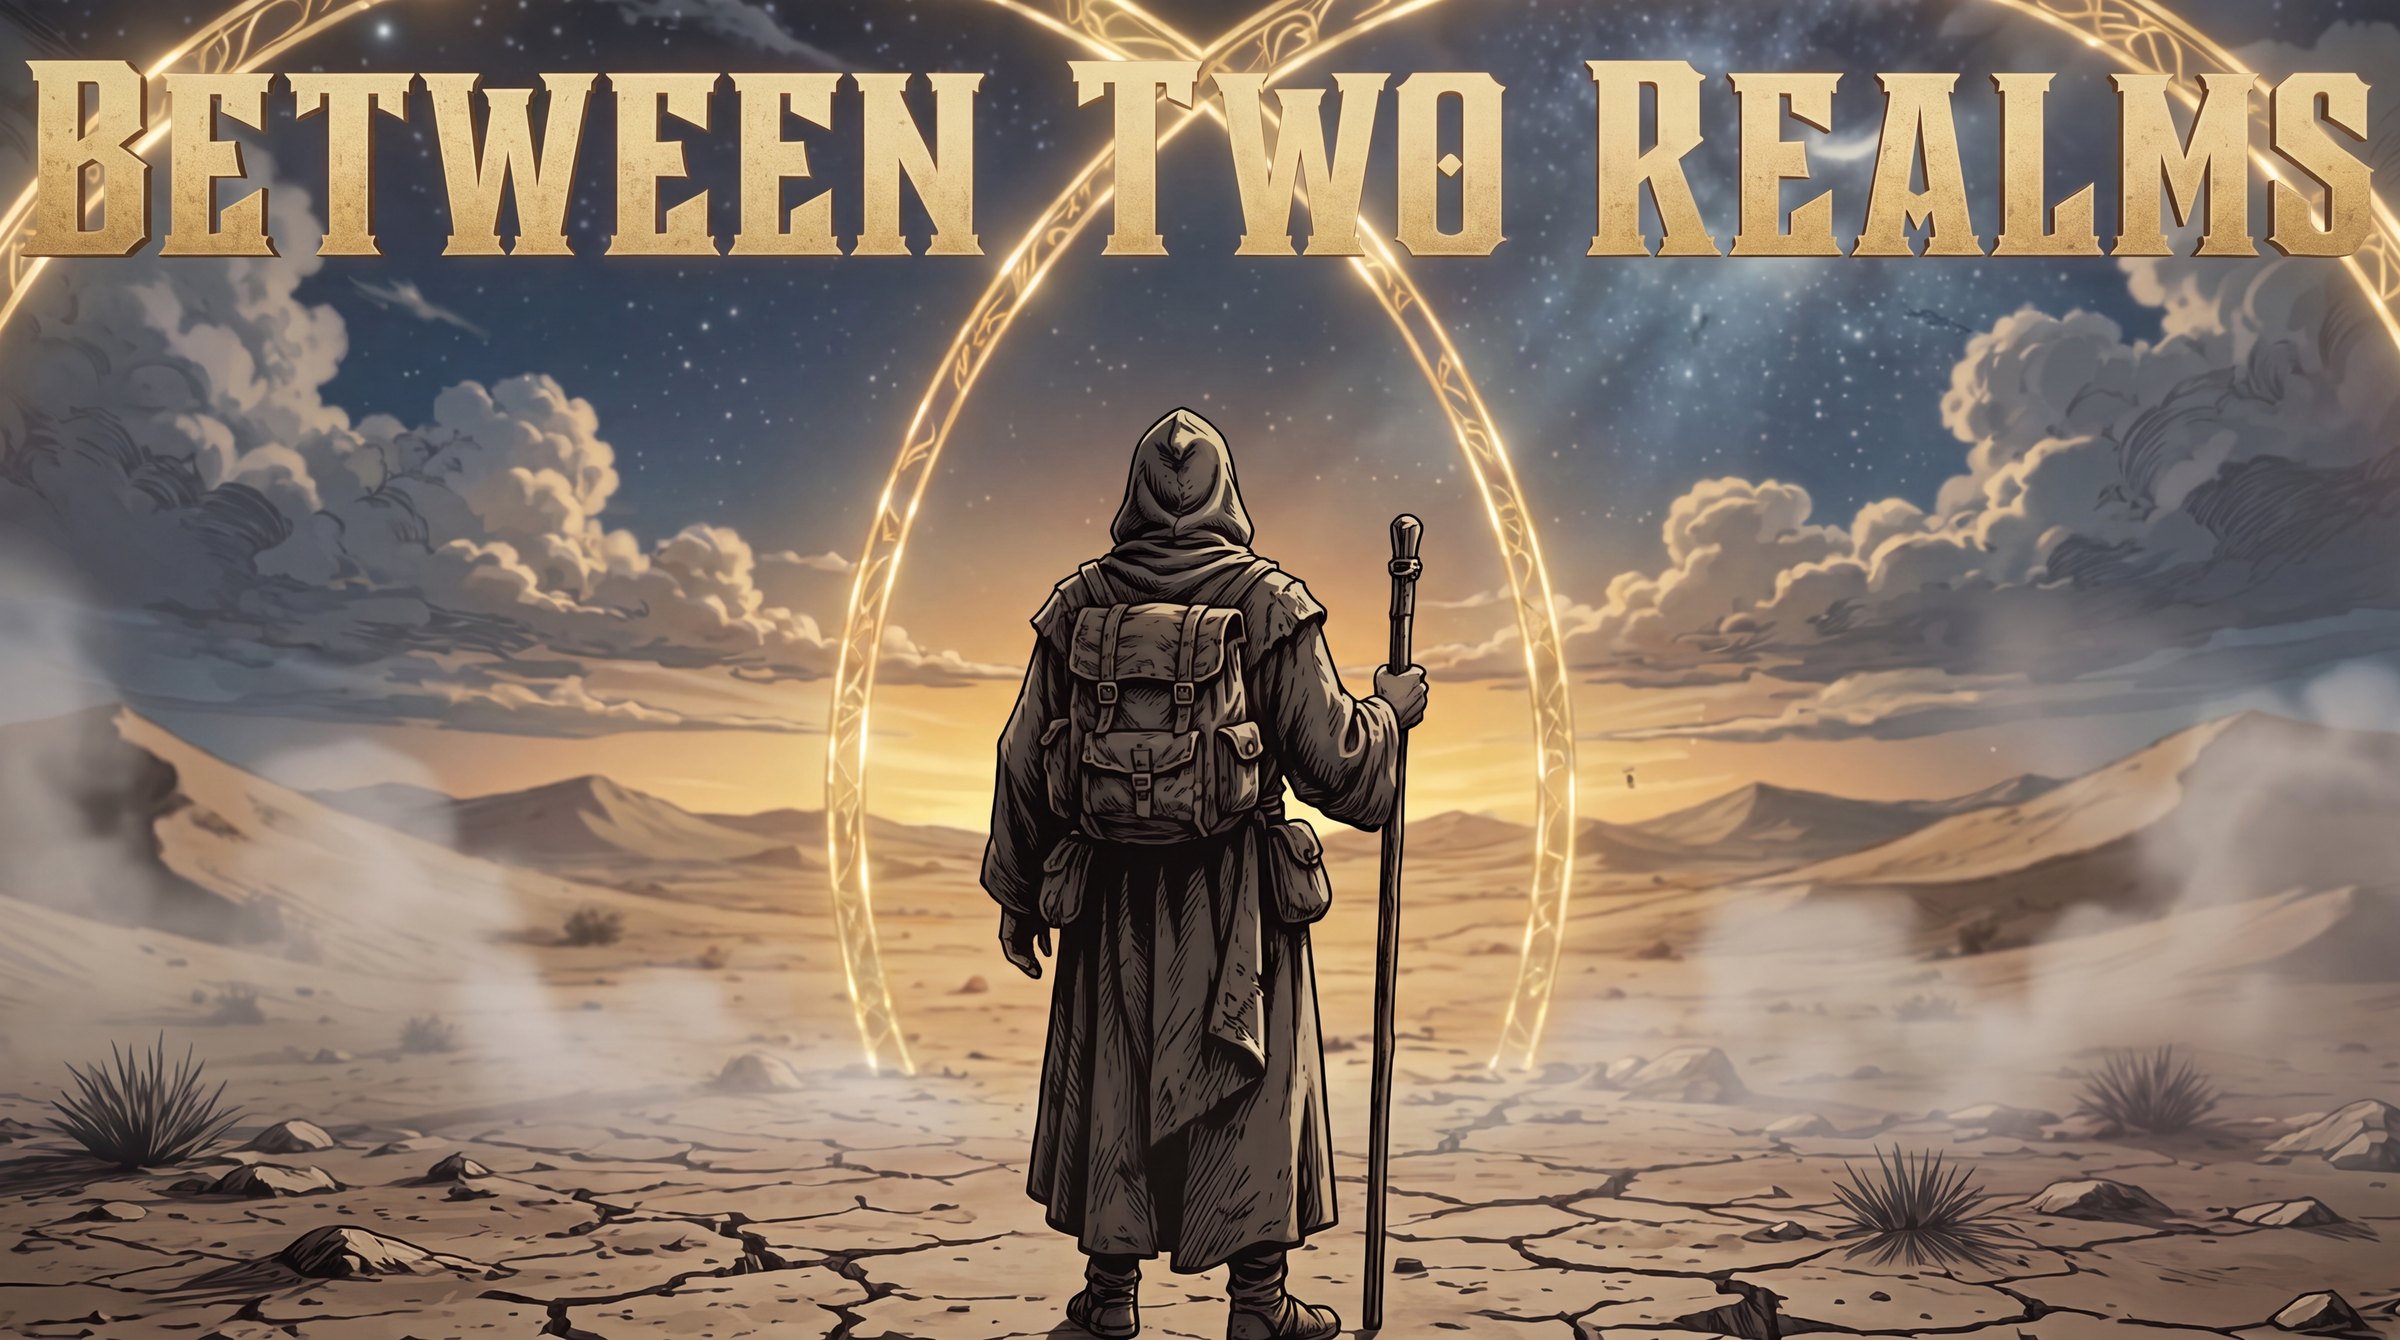
In use: the full-bleed band on the home page (desktop). A cinematic still of the pilgrim at the gateway between two realms.
Full size (opens in a new tab)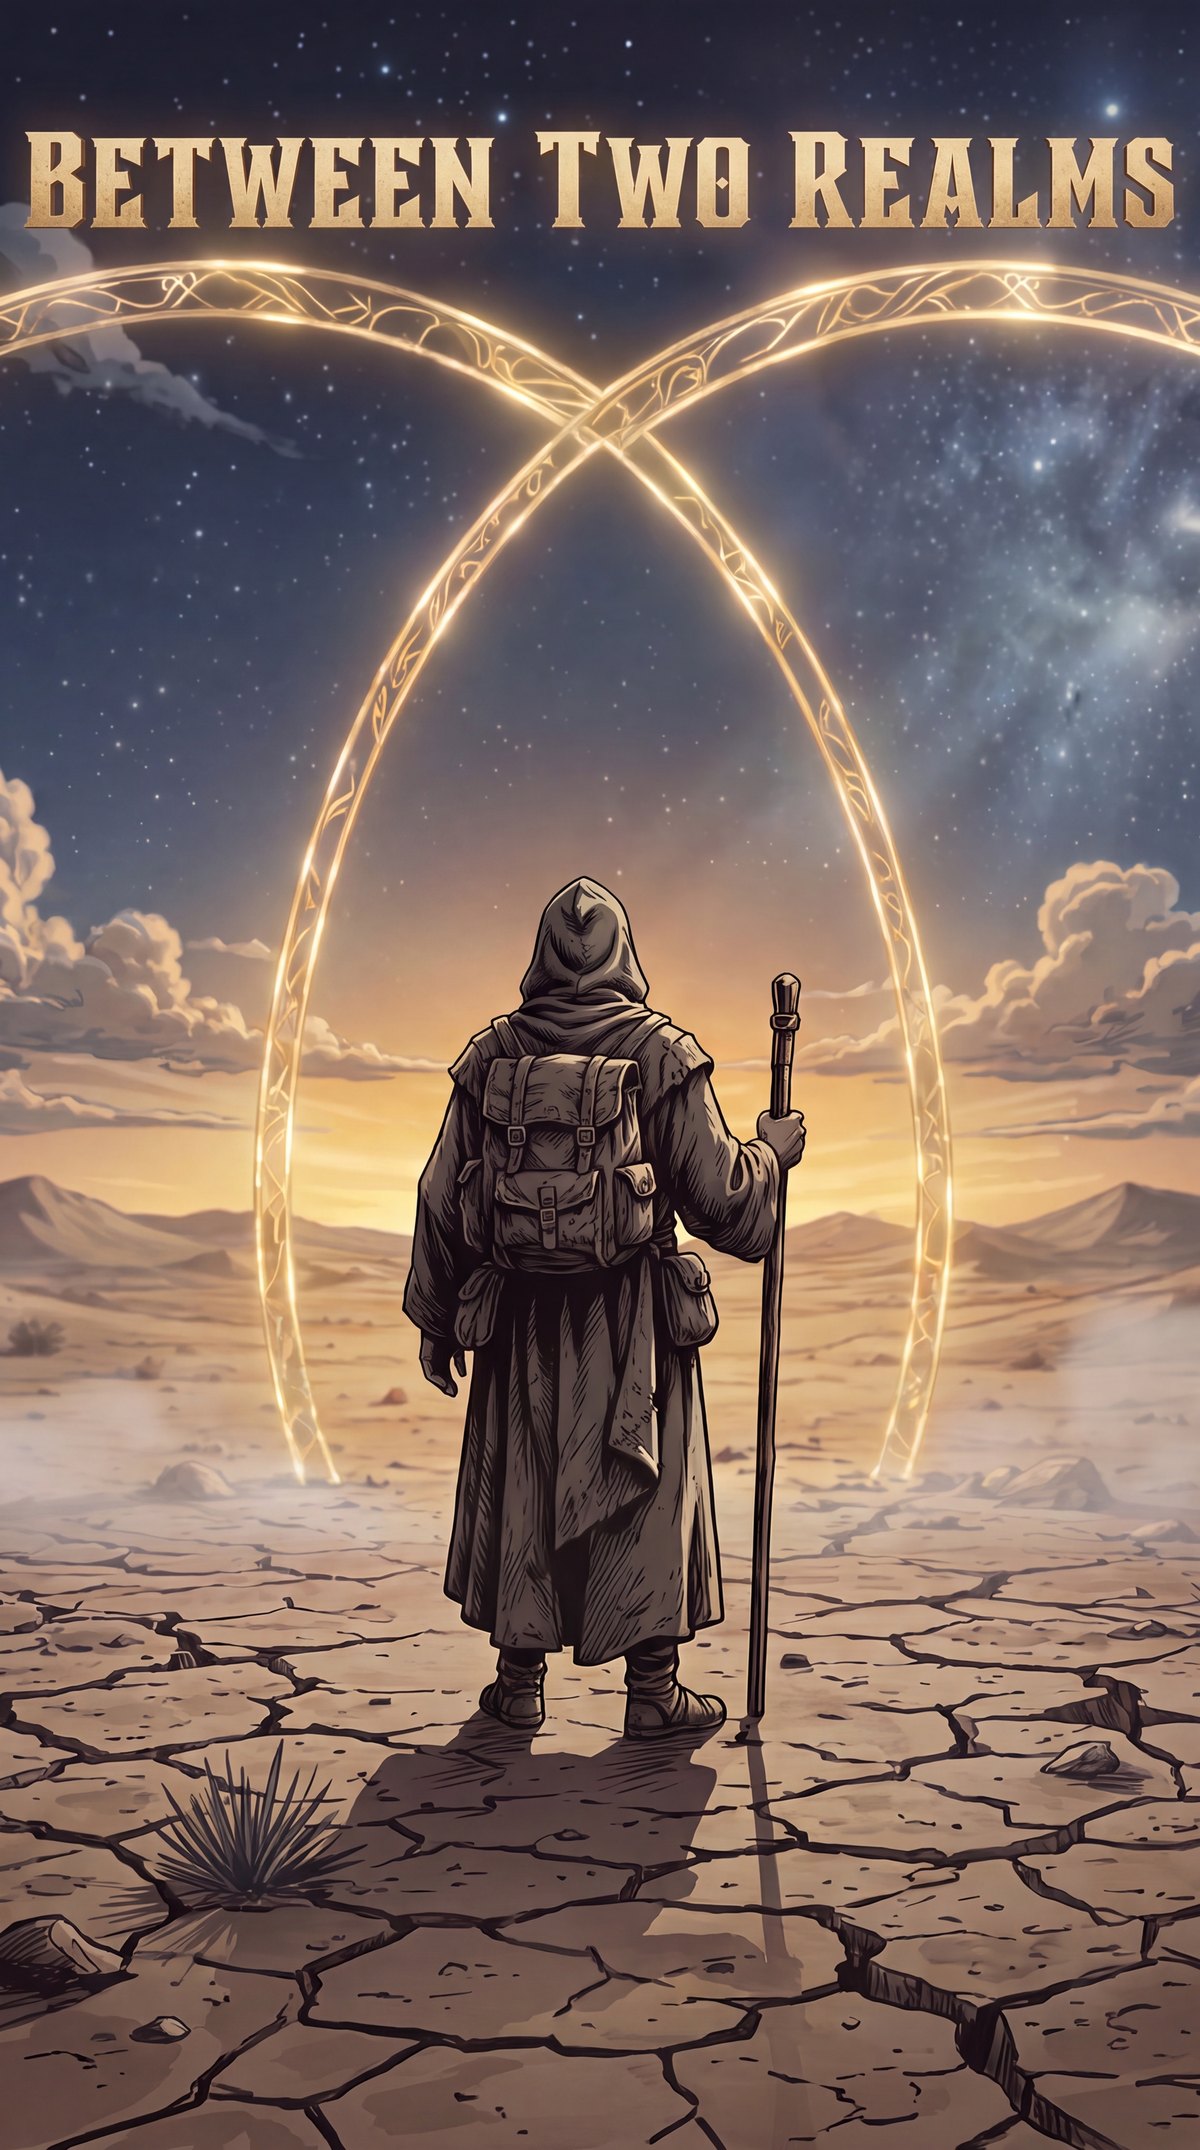
In use: the home page threshold band on phones. The same scene recomposed tall.
Full size (opens in a new tab)
In use: the link-preview card shown when a page is shared on social media, composed at 1200x630 from the title card.
Full size (opens in a new tab)The prototype marks generated while searching for the logo, kept here for reference. These are directions still under consideration, not finished brand devices. Each plate links to its full-size file.
Round 1. The hat pilgrim struck as a round coin. (Gemini v1)
Full size (opens in a new tab)Round 1. The hat pilgrim struck as a round coin. (Gemini v2)
Full size (opens in a new tab)Round 1. The hat pilgrim struck as a round coin. (OpenAI v1)
Full size (opens in a new tab)Round 1. The hat pilgrim struck as a round coin. (OpenAI v2)
Full size (opens in a new tab)Round 1. The radiant gateway struck as a round coin. (Gemini v1)
Full size (opens in a new tab)Round 1. The radiant gateway struck as a round coin. (Gemini v2)
Full size (opens in a new tab)Round 1. The radiant gateway struck as a round coin. (OpenAI v1)
Full size (opens in a new tab)Round 1. The radiant gateway struck as a round coin. (OpenAI v2)
Full size (opens in a new tab)Round 2. The pilgrim paired with a BTR lettermark. (Gemini v1)
Full size (opens in a new tab)Round 2. The pilgrim paired with a BTR lettermark. (Gemini v2)
Full size (opens in a new tab)Round 2. An interlaced BTR monogram / cipher. (Gemini v1)
Full size (opens in a new tab)Round 2. An interlaced BTR monogram / cipher. (Gemini v2)
Full size (opens in a new tab)Round 2. The letters BTR set over a radiant gateway. (Gemini v1)
Full size (opens in a new tab)Round 2. The letters BTR set over a radiant gateway. (Gemini v2)
Full size (opens in a new tab)Round 2. The pilgrim beneath an arch above a BTR lettermark. (Gemini v1)
Full size (opens in a new tab)Round 2. The pilgrim beneath an arch above a BTR lettermark. (Gemini v2)
Full size (opens in a new tab)Round 3. The BTR cipher in an oval roundel. (Gemini v1)
Full size (opens in a new tab)Round 3. The BTR cipher in an oval roundel. (Gemini v2)
Full size (opens in a new tab)Round 3. The BTR cipher in a circular roundel. (Gemini v1)
Full size (opens in a new tab)Round 3. The BTR cipher in a circular roundel. (Gemini v2)
Full size (opens in a new tab)Round 3. The BTR cipher in a circular roundel. (Gemini v3)
Full size (opens in a new tab)Round 3. BTR over a gateway in a circular roundel. (Gemini v1)
Full size (opens in a new tab)Round 3. BTR over a gateway in a circular roundel. (Gemini v2)
Full size (opens in a new tab)Round 3. BTR over a gateway in a circular roundel. (Gemini v3)
Full size (opens in a new tab)Round 3. BTR over a gateway in a circular roundel. (Gemini v4)
Full size (opens in a new tab)Round 4. A pilgrim stepping through a lit doorway. (Gemini v1)
Full size (opens in a new tab)Round 4. A pilgrim stepping through a lit doorway. (Gemini v2)
Full size (opens in a new tab)Round 4. A pilgrim stepping through a lit doorway. (Gemini v3)
Full size (opens in a new tab)Round 4. The pilgrim in the vesica of two rings. (Gemini v1)
Full size (opens in a new tab)Round 4. The pilgrim in the vesica of two rings. (Gemini v2)
Full size (opens in a new tab)Round 4. The pilgrim in the vesica of two rings. (Gemini v3)
Full size (opens in a new tab)Round 4. The pilgrim in the vesica of two rings. (Gemini v4)
Full size (opens in a new tab)Round 5. Two realms as facing crescents. (Gemini v1)
Full size (opens in a new tab)Round 5. Two realms as facing crescents. (Gemini v2)
Full size (opens in a new tab)Round 5. A second crescent treatment. (Gemini v1)
Full size (opens in a new tab)Round 5. A second crescent treatment. (Gemini v2)
Full size (opens in a new tab)Round 5. The two interlocking rings alone. (Gemini v1)
Full size (opens in a new tab)Round 5. The two interlocking rings alone. (Gemini v2)
Full size (opens in a new tab)Round 6. The two-ring coin with Andre's hooded traveller; this round produced the current nav mark. (Gemini v1)
Full size (opens in a new tab)Round 6. The two-ring coin with Andre's hooded traveller; this round produced the current nav mark. (Gemini v2)
Full size (opens in a new tab)Round 6. The two-ring coin with Andre's hooded traveller; this round produced the current nav mark. (Gemini v3)
Full size (opens in a new tab)Round 6. The two-ring coin with Andre's hooded traveller; this round produced the current nav mark. (Gemini v4)
Full size (opens in a new tab)Round 6. The two-ring coin with Andre's hooded traveller; this round produced the current nav mark. (Gemini v5)
Full size (opens in a new tab)Round 6. The two-ring coin with Andre's hooded traveller; this round produced the current nav mark. (Gemini v6)
Full size (opens in a new tab)